I built it this afternoon, which is exciting, because previously I thought when people “built things in an afternoon” they were lying. Turns out repetition is key. After deploying new React apps a few times, I am a veritable factory of widgets no one asked for.
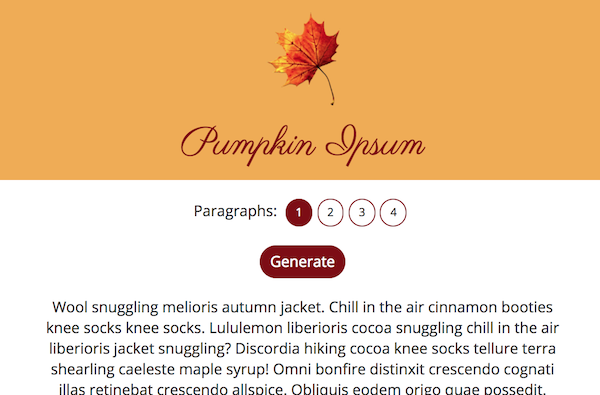
The hardest part of this was coming up with a dictionary! I had to limit the Latin I mixed in so it didn’t overwhelm my limited mood words. Still, the text can look repetitive. (You can see that “knee socks” appear three times in the preview.) I see text analysis on Buzzfeed articles about fall in my future.
All I have left to do is connecting the React app to its data. This is a super simple use case for AJAX from React: showing someone else’s data when my page loads.
In my case, I need to do this fetch because my data and my app don’t come from the same server. My app is being rendered by Github Pages. My data lives far away in a tiny DynamoDB database, accessed by an AWS Lambda function behind an AWS API Gateway.
But this data could be anything coming from anywhere and the idea would be the same. You don’t have it; you want to get it and then display it.
The idea is to wrap my presentational component(s) in a higher order component that calls for the data. Right now my app is like so:
And I need to extract an outer component that does the call, like so:
importReact,{Component}from'react';classAppextendsComponent{state={foo:null}componentDidMount(){foo=getTheData();// make the AJAX callthis.setState({foo});// save the data into state}render(){return(<Viewfoo={this.state.foo}/>
);}};// View receives foo as a prop.// It doesn't know and doesn't care where its data comes from.constView=({foo})=>(<div>{foo}</div>
);exportdefaultApp;
The upside of getting my data this way: super flexible! Downside, it could fail and there’s visible lag while the AJAX call loads, so I’ll probably add error handling and a loading indicator.
The first draft of my app had to change a little to use DynamoDB. It’s my first time using a non-relational database and when I switched from sorting on a primary key to sorting on timestamps, I broke it.
The reason is pretty funny and not at all about the database. I’m used to sorting iso8601-formatted dates on the front end, which are strings and can be sorted like strings. But since my dates originate in Javascript I’m saving them as milliseconds past the epoch, which are numbers – and calling sort on numbers coerces them to strings (because Javascript) and compares them as words. You must pass an explicit comparison function. Instead of things.sort(item => item.foo) do: things.sort((a, b) => (a.foo - b.foo)).
I also got a new motorcycle, because I didn’t want to backport old data. Just kidding, but I actually did. Now I have a fuel indicator light. It’s basically a car! Since I no longer have to set (and be laser focused on) the trip odometer to keep from running out of gas, it seems silly that I was ever recording the trip miles separately. So now I’m only tracking three data points and the math is simpler.
With the fetch and new sorting, vroombot is up! Populated with fake data at the moment because it’s snowing :(
So I built a single-page React app on Github Pages. And I have a database that I can text. I want to get them talking to each other.
With the scary AWS setup out of the way, this should be fun!
I plan to create another AWS API Gateway endpoint. I’ll connect that to a new AWS Lambda function that fetches from my DynamoDB database and responds with JSON. Finally I’ll add an AJAX call to my React app that calls out to my endpoint on page load.
Back to AWS
A new Lambda function
The AWS docs on fetching from DynamoDB say you generally shouldn’t use SCAN to fetch a whole table in a real app. However, we are building a bot that texts from motorcycles, so SCAN sounds perfect. I followed this Node.js DynamoDB code.
// Load the SDK for JavaScriptvarAWS=require('aws-sdk');// Set the regionAWS.config.update({region:'us-east-1',endpoint:'https://dynamodb.us-east-1.amazonaws.com'});constdocClient=newAWS.DynamoDB.DocumentClient();// No other params to specify -// we want the whole table and every field in it.constparams={TableName:"fillups"};constonScan=(err,data)=>{if(err){console.log('error: ',err);}else{console.log('data: ',data);}return;};docClient.scan(params,onScan);
And it works! I had one test item in the database.
Part 2: Reading the response and writing to a database
Cloudwatch
Now all the services are talking. But what are they saying? To see what Twilio is passing to my function (hopefully my text message!) I put in some logging and went to Cloudwatch, where all Amazon Lambda functions automatically log.
Following this tutorial, I went back to the console to figure out DynamoDB.
Since DynamoDB is NoSQL it doesn’t have an auto-incrementing primary key. I have a natural primary key in my timestamp, so I used that.
DO
Adjust the IAM permissions of the user that created your lambda function to include AmazonDynamoDBFullAccess.
Provide key for new objects
I got it working like so:
varAWS=require('aws-sdk');AWS.config.update({region:MY_REGION});ddb=newAWS.DynamoDB({apiVersion:'2012-10-08'});vardbParams={TableName:'fillups',Item:{'gallons':{N:gallons},'miles':{N:miles},'dollars':{N:dollars},'time':{N:String(Date.now())},},};ddb.putItem(dbParams,function(err,data){if(err){console.log("Error",err);textMe('Something went wrong.')}else{console.log("Success",data);textMe('It worked!')}});
I’ve been working on server-side OAuth a lot lately. It’s made me curious: how could I integrate authorization in a purely client side app … like a React app deployed to Github Pages?
There’s nowhere to hide secrets on a single-page app. If I don’t want a server, I need to go serverless.
I thought the next stage of my mileage widget might involve a dedicated Twitter account that I text to set off the action. But webhooks are still in restricted beta at Twitter and ain’t no one got time for that.
Instead I could use Twilio, a programmatic SMS service, to hit an AWS Lambda function that parses the text and writes to my database (and if I’m feeling fancy, posts to Twitter)! Then when the app loads, it can hit another Lambda function that fetches from the database.
All the services I played with today are free. Let’s go:
The first stage: Text -> Twilio -> API Gateway -> Lambda
Twilio with Express and ngrok
First, sign up for Twilio. I followed the quick start guide and was texting to my phone right away.
To receive texts, we need an API endpoint. So I started locally with a basic Express server and ngrok to expose the endpoint. This is just to help me work; I could have jumped right into AWS Lambda but it’s much easier to find what’s wrong when I control everything and can change one thing at a time.
Make a directory and cd into it. You probably want to npm init because having a package.json will come in handy soon. Then npm install express. You are ready to serve some internets.
I pasted this into my index.js file:
constexpress=require('express')constapp=express()constport=3000app.get('/',(request,response)=>{console.log("I received a text!")})app.listen(port,(err)=>{console.log(`server is listening on ${port}`)})
That’s it, that’s your whole server. Run:
nodeindex.jsngrokhttp3000
You’re on the Internet!
Copy the url it gives you into the Twitter console as a webhook and set its action to ‘GET’. Now, text Twilio. You should see “I received a text!” in your console.
Side note: you’ll notice your ngrok URL changes every time you start and stop ngrok. Which means you have to go paste the new URL into Twilio again. If this gets annoying you can sign up for ngrok and get static URLs.
So, I have webhooks working locally. But this doesn’t do me a lot of good because I don’t actually want to run my own server.
AWS Lambda
This is the part I was dreading. I looked briefly at Lambda last year and found it confusing – I didn’t understand how to include dependencies or use environment variables, or what the arguments being passed to my function were or where I could find documentation on them. Thankfully lots of people have these questions so I was able to find REAMS of documentation.
It turns out there’s not a lot of difference between you running your file with node index.js and Lambda running it. As long as your directory contains all your dependencies, you’re golden. You need to export a handler function from your Node file, zip up your directory, and upload the .zip file to Lambda. It calls the file and handler function you specify and your code runs just like it does on your machine.
I achieved success in the following way:
Download, install and configure the AWS CLI. I had to step back from the latest version of Python to get it to work.
Create a test Lambda function in the AWS web console. (You can do this with the CLI, but I went back and forth between the two.)
You should be able to see your Lambda functions in the console like so:
aws lambda list-functions
Get rid of your old index.js and write your function. I’ve already figured out how to text through Twilio, so to test including npm modules in my Lambda function, I decided to stick with that. You can set environment variables in the AWS web console, but I added dotenv (npm install dotenv) because I am not to be trusted with environment variables and will commit them to version control the first chance I get.
Now index.js looks like this:
// Load the environment variables.require('dotenv').config()// Twilio CredentialsconstaccountSid=process.env.ACCOUNT_SID;constauthToken=process.env.AUTH_TOKEN;// require the Twilio module and create a REST clientconstclient=require('twilio')(accountSid,authToken);// Export the handler function that Lambda will look for.exports.handler=(event,context,callback)=>{client.messages.create({to:process.env.MY_PHONE_NUMBER,from:process.env.TWILIO_PHONE_NUMBER,body:"Hello from Lambda!",});constresponse={"statusCode":200,"body":"This is required",};callback(null,response);};
Do:
Zip the CONTENTS of your directory, not the directory.
Recursively zip (zip -r) so you get the contents of your directory’s contents.
Export your handler function and name your index file what your Lambda function is expecting. Defaults are index.js and handler.
Push your zipfile to AWS Lambda (I had an existing function named vroombot I created in the web console). For me, this whole process looked like this:
and I can run npm run deploy to deploy the updated function to Lambda.
The API Gateway
To call the function, I need an API endpoint. So I configured an AWS API Gateway to proxy a web request to my lambda function. Unfortunately I’ve lost the exact tutorial I used.
Once you’ve set up your action you can hit “Test” in the API Gateway console. When I did, I got a text.
But to get this on the Internet, I need to deploy the API. I guessed that my rest-api-id was the number on the top of the screen and I was right.
Mine returned what I presume is my deployment id. Go to your console, click Stages, and you should now see an Invoke URL. Paste it into your browser and you should get a text!
I made a mileage tracking widget with create-react-app for my bike.
create-react-app is amazing – it took me more time to read this tutorial than to get it deployed to Github Pages.
Previously I’d been keeping photos of my odometer and gas receipts on my phone. For the purpose of this exercise I transcribed them into a file, like so:
I know, it looks like it wants to be a database, but a database would be overkill for my purposes right now.
In App.js, all I have to do is import store from './store' and we’re in business. I know, it’s like it wants to be Redux, but … also overkill.
I made two additions for creature comfort: recompose and react-bootstrap. Recompose is a helper library that expresses common React idioms as higher order components, or as functions that return HOCs. Bootstrap is so overused as to be totally uncool but whatever. You don’t have to use either, but I like them.
To start, I wanted to build a menu of entries that I can switch between. Besides viewing
each entry, I also wanted a running “totals” section to view my average gas mileage.